Make Payment
Overview:
If you add or approve the bill, here’s some guidance on entering information into the fields.
Create Make Payment
- In the left navigation menu select to make payment to pay vendor payments
- Click “+Add Make payment” to add new payments.
- Complete the make payment form.
- Click “Save and Continue Edit” to save the payment as a draft, or click “Save and Approve” to approve or click “Save and Pending” to mark the payment as pending and enter a new payment or click “Save and New” to record a new payment and save the previous one or click “Save and Close” to close the payment and save the payment in draft status.
Make payments field and their description
- Vendor: Enter the name of the supplier you would like to pay. If you enter a name that’s not already a contact, Splendid Account adds it to your Vendor contacts.
- Date: This will default to today’s date. You can change this also.
- Make payment number: Use the Splendid Accounts default numbering sequence or you can add your customized number sequence.
- Reference: Choose a reference to suit your company or your supplier. Later, you may want to search for your purchase return using your chosen reference
- Group: This field appears only if you have set up Groups. Groups let you customize the differentiate of your vendor payment from different groups.
- Currency: If you have a Business Edition plan with multi-currency, you can select a foreign currency vendor that you’ve already added, you can edit the exchange rate if required.
Make payments line fields
- Click on the payment mode searching box to add your payment mode to pay.
- Click the Right icon to save the line item, or click the Cancel icon beside the line item to save or cancel the line item.
- Use the Tab key on your keyboard to move between the lines.
Make payment line field and description
- Payment mode: Select the payment by which mode you have to pay your vendor.
Different payment modes could be selected against single payable.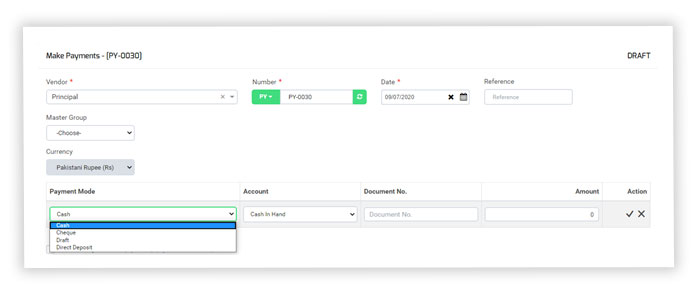
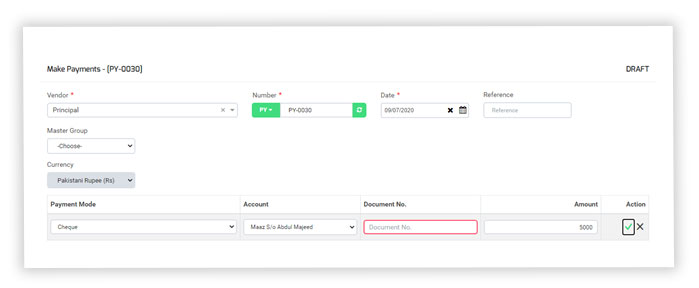
- Accounts: Must be mandatory to select your accounts against payment mode from which account you would need to your vendor.
- Document Number: Entered the document number for record of your account.
Must be mandatory to enter the draft number against Cheque, Draft, and Direct Deposit payments.
- Detail Group A: This field appears only if you have enabled Groups. Groups let you customize the differentiation of your vendor payment in many ways.
- Detail Group B: This field appears only if you have enabled Groups. Groups let you customize the differentiation of your vendor payment in many ways.
- Amount:Enter the amount you have to pay against the payable invoices.
Pay full amount or partial amount.
- Account adjustment:Splendid Accounts has an account adjustment (optional) field to adjust your bills or enter the Tax rebate expenses in the Total bill.
Or Add shipping charges of your goods received or services you take from your vendor or supplier.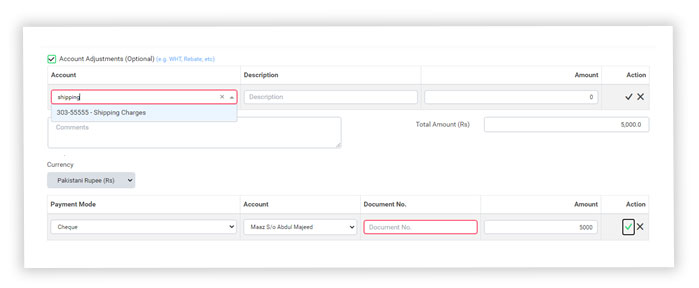
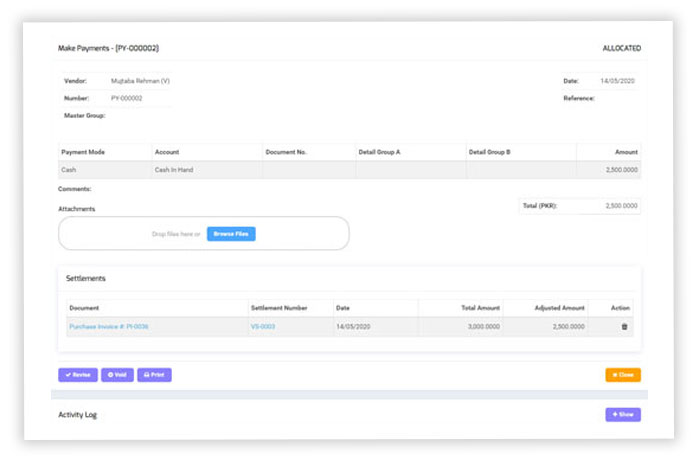
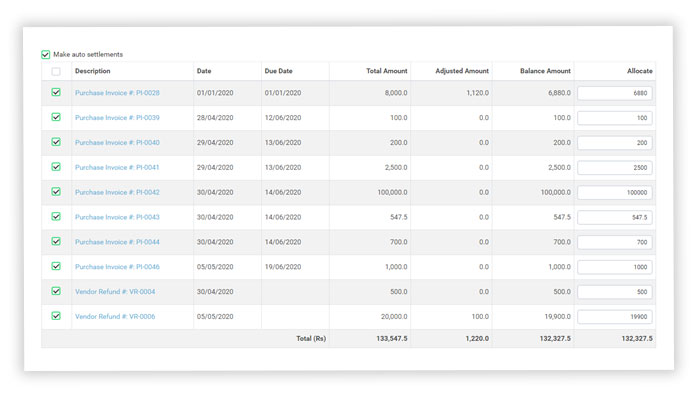
Settlements
- In Splendid Accounts, you have to option settle your payable bills against vendor payment.
- Also, you can settle your supplier or vendor’s Debit note.
- The default auto settlement of invoice and debit note has been settled against you returned amount entered.
- Also, you can settle your payables manually you want to settle against payment entered.
- Also, you have seen your adjusted amount and Balance amount in settlements.
Default signatures at Make payment document
Signatures are now available in all templates of make payment templates.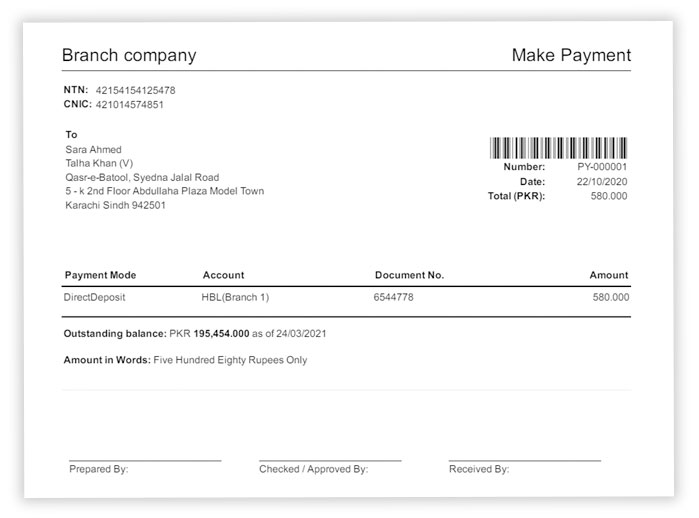
Default signatures at Make payment document
Signatures are now available in all templates of make payment templates.