Sale Invoices
Create an invoice
Overview
Create a new invoice or copy an existing one to outline the cost of work that a customer needs to be done. You can enter line by line details of the proposed invoice as well as attach any additional files, such as images or your businesses’ terms and conditions.
- In the Sales menu, select Invoice.
- Click “+Add Sale Invoice”
- Enter the name of the customer you’re creating the invoice If you use multi-currency, you can enter your invoice in the currency of the customer.
- If the customer is not existing in the system you can directly add the customer right from the current screen by just writing the customer name and click enter, a form will be open for an additional customer you can save it and make a further transaction.
- Click Type to search product and select the product, if it is not existing then you can enter the product directly the same as the customer name. Type the description of the product, then add the Quantity and Price.
- You can add a line item discount and multiple taxes in a single product as per your needs.
- You can also add Shipping Charges directly in the invoice at the bottom right corner which will record as shipping charges expense.
- Click Save and Continue Edit to save the invoice as a draft, or click Save and Approve to approve or click Save and Pending to mark the invoice as pending and enter a new invoice or click Save and New to record a new invoice and save the previous one or click Save and Close to close the invoice and save the invoice in draft status.
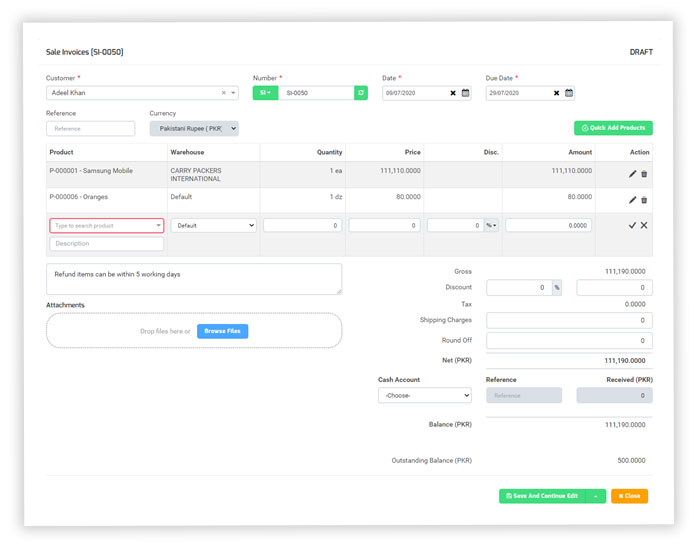
Header Fields:
- Customer: Enter the name of the customer you would like to sell your products to. If you enter a name that’s not already a contact, Splendid Account adds it to your Customer list.
- Date: This is set as default to the current date. You can change this also.
- Due Date: Let your customer know the date on which the invoice gets due.
- Number: Use Splendid Accounts default numbering sequence or you can add your number sequence by clicking on number code and then a “+ “sign
- Reference: Choose a reference to suit your company. Later, you may want to search for your quote using your chosen reference.
- Master Group: This field appears only if you have enabled Groups. Groups let you customize the quote in many ways.
- Currency: If you have a Business Edition plan with multi-currency, you can select a foreign currency customer that you’ve already added, you can edit the exchange rate if required. If you entered a default currency customer, it automatically displays.
- Exchange Rate: This field will display if you select a customer of such currency that is different from your company’s currency so that you have to provide an exchange rate for the particular customer.
- Order Booker: This field appears only if you have enabled. Let your customer know which order booker will go and collect the order. You can add multiple order bookers under the Sales Person menu.
- Sales Man: This field appears only if you have enabled. This will display a list of all the salesmen you have entered into the system.
- Delivery Person: This field appears only if you have enabled. Select the delivery person of your choice for a particular customer, also you can choose based on areas.
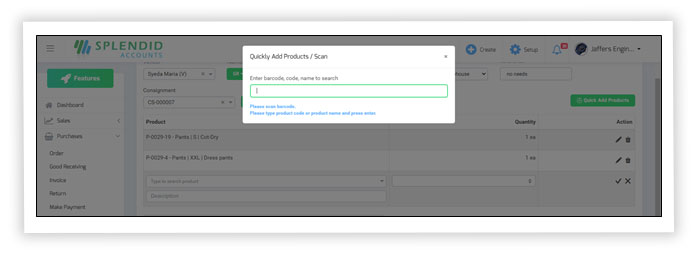
- Add Quick/Scan Product: You can also Scan your multiple products directly from Barcode scanner or enter a product name or Product number through Add Quick product box.
Line Item Fields:
- Product: Select products if you have inventory products set up for your organization. Inventory products speed up data entry by automatically filling in the product field with information you’ve saved against your inventory products.
If you enter a product that’s not already in inventory, Splendid Account adds it to your inventory. - Product Description: Enter text as you’d like to describe the products, you’re marketing. You can include description lines in your product’s short description that will automatically display at line item.
- Warehouse: Select the warehouse in which the inventory will be managed. The default warehouse will be displayed in the invoice form if you set the warehouse as default in the warehouse section. If there is only one warehouse, no dropdown will be available as all the inventory will be managed in that warehouse.
- Quantity: Enter the number of products you want to sell.
- Price: Splendid Accounts display the default product price that you have set in the product form or also you can enter your price.
- Last Sale Price: This display of you click in the price field, representing the last selling price of the product.
- Discount: Splendid Accounts has 3 different types of line item discount i.e.
(1. Discount% 2. Discount in Amount 3. Discounted price per unit) you can enter your discount as per supplier agreement. - Tax: Splendid Account has an option to add multiple Tax on products. If you have set up the product tax in product form default tax will be display. Or you can add additional tax into it.
- Detail Group A: This field appears only if you have enabled Groups. Groups let you customize the quote in many ways.
- Detail Group B: This field appears only if you have enabled Groups. Groups let you customize the quote in many ways.
- Amount: This is the calculated amount of customers have to pay against a product.
- Consignment: Add a consignment number to record from against which consignment has been received. The consignment will display if you have enabled tracking the consignment from company settings.
Generated and Send Via Email
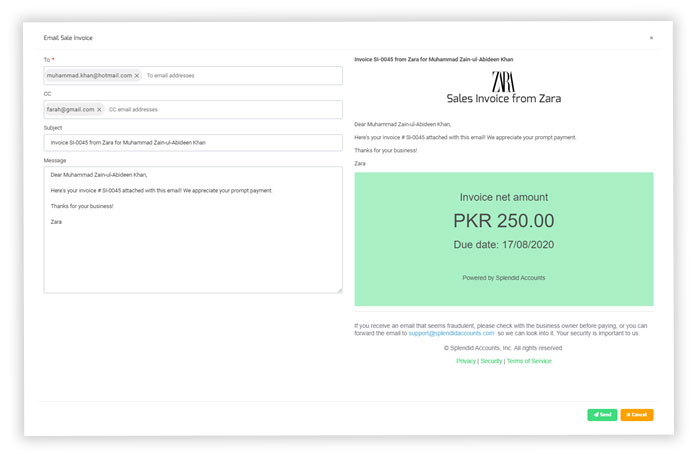
You can send a sale invoice to your customers after they get approved. Click the “Send Email” button at the bottom of the page by which a pop-up window displays viewing all the details for an email. You can also CC the invoice to the desired person. At a time, you can send emails to a maximum of 10 persons.
- From and Reply-To Default splendid account mail settings proceed but if you want to use your email address, you can set it at SMTP settings under company settings
- To: Email addresses of your customers would be defined here, if you have set the customer email address at the customer page system will display that email address by default.
- CC: enter the email address to send yourself a copy of the email.
- Email template: Splendid Accounts is offering a default template for sending an email but you can change the content of the message body and get it changed on the right side of the pop-up window.
- Message Body: A default message is given in the email template but it can be changed.
- Subject: Splendid Accounts populates the Subject line with the text in the selected email template. You can edit this directly in the field.
- Include PDF attachment: A PDF copy of the invoice is attached when you send an email of the specified invoice.
Mark an Invoice as Sent
- In the Sales menu, select Invoices.
- Select the Approved or Partially paid invoices. Draft or Pending invoices can’t be marked as sent.
- Find and open the invoice you want to mark as sent.
- Select the send email button.
Once the email sent successfully the invoice is set to be as Sent
Multiple Printing Sale Invoice Template
Splendid Accounts is offering you a wide variety of sale invoice templates. Currently, there are more than 5 templates available you can choose under printing templates settings.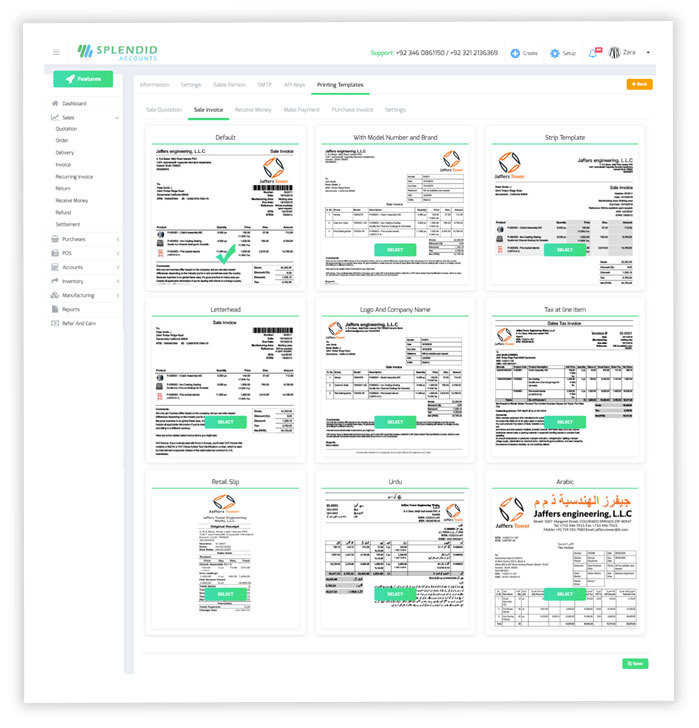
Outstanding balance will display as collectively for shared customers in branches
a-If a company has shared customers across its multiple branches, at sale invoice page, you can directly view the customers’ outstanding balance of all branches as it is collectively displaying.
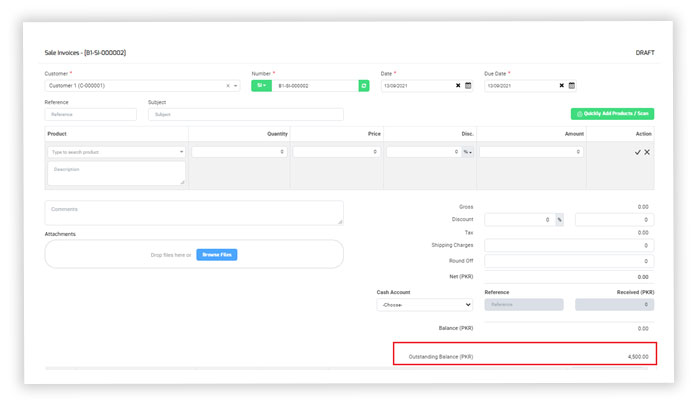
b- Also, in the case of shared customers for different branches, branch filter is not available in the following reports
• Customer Ledger
• Customer Balance
• Aged account receivable report
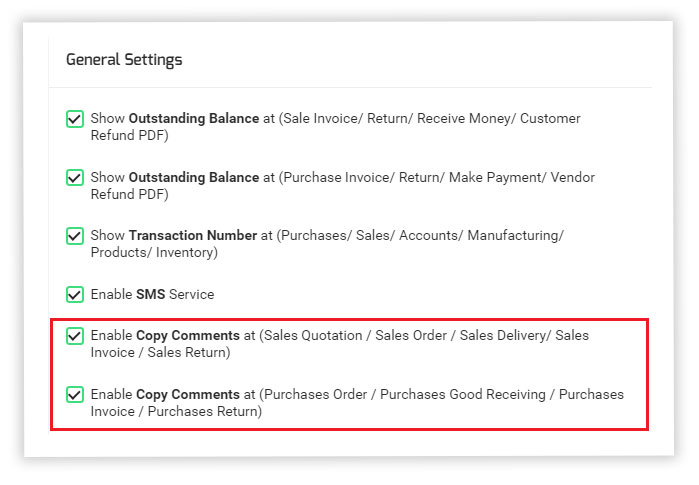
Copy comments for Sale Invoice
Splendid accounts is now offering an option under company settings to copy comments from sale quotation to sale order, sale order to sale invoice and onwards.
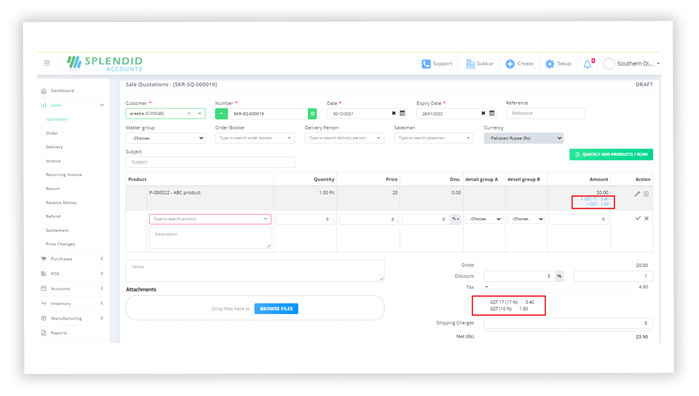
Displaying break up of all taxes in overall tax amount
Tax amount that has been added in line item is displayed separately in overall amount. You can see this on every screen where tax is applied on amount in line item.
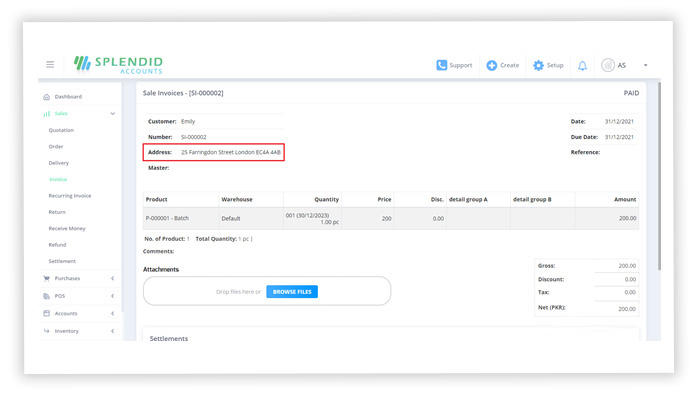
Customer’s Address
If a customer has address in its record then when a user creates a sale invoice of that particular customer, address is also displayed in approved document view mode.
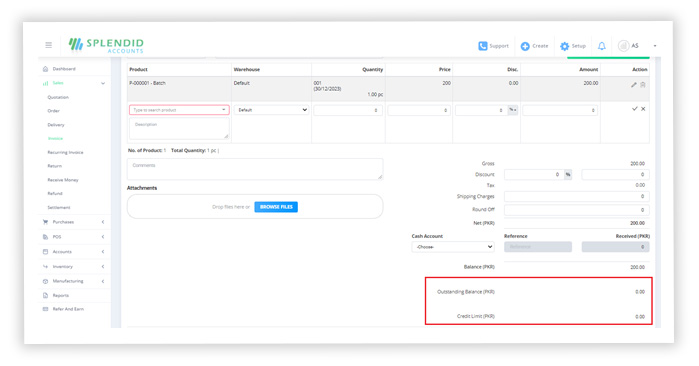
Credit Limit and Outstanding balance
System displays credit limit amount of customer below outstanding balance of that customer.
Option to display 0 batch products in company settings
There is an option in company settings to display 0 batch product or not, in making transactions. If this checkbox is checked then system will display batches with 0 inventories and if this checkbox in unchecked then only those batches will be displayed which are in stock.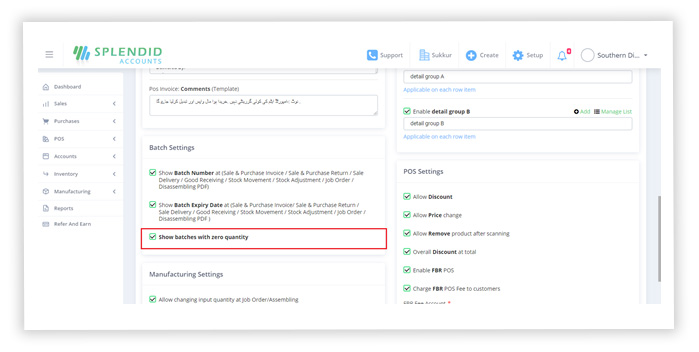
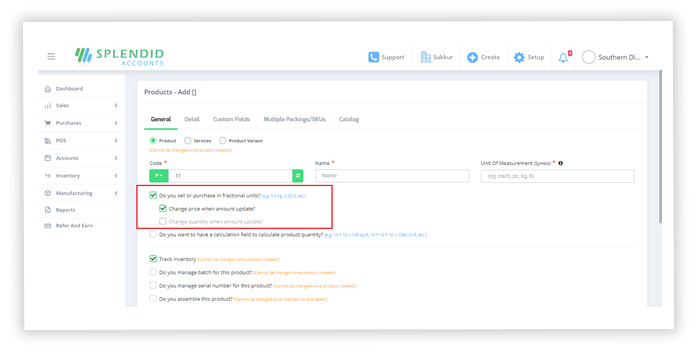
Options to either update price or quantity of product
When a new product is created, there are two options available under the heading of “Do you sell or purchase in fractional units”.
These options have following functionality;
- Change price when amount update
When this checkbox is checked, it will update the price when the amount is changed. - Change quantity when amount update
When this checkbox is checked, it will update the quantity of product when amount is changed.
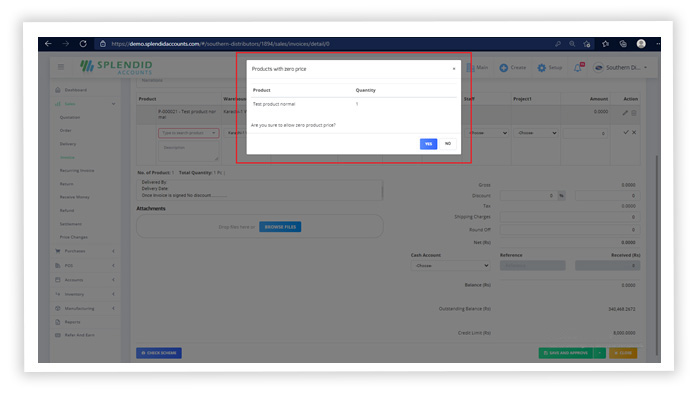
Confirmation message to proceed with 0 price
In frequent entries users sometimes don’t notice the price and do transactions with 0 prices. For this purpose a confirmation message is displayed when user enters any product with 0 price and proceed with the transaction.
